3D printers

The resin printers do look really interesting. The build size is small for comparable costs to FDM, and some nasty chemicals that you shouldn’t pour down the sink. Amazing quality though. There is one video where he printed M2.5 screw threads and they were perfect.

If you are printing small games models and the like, resin seems the way to go.


you can get plant based resin. the quality from resin prints looks really good and detailed. i found a group on facebook and the photos and constant tinkering using filaments were putting me off, then someone posted photos from a resin printer and I looked it up on youtube and I think resins the way Im going to go.
 
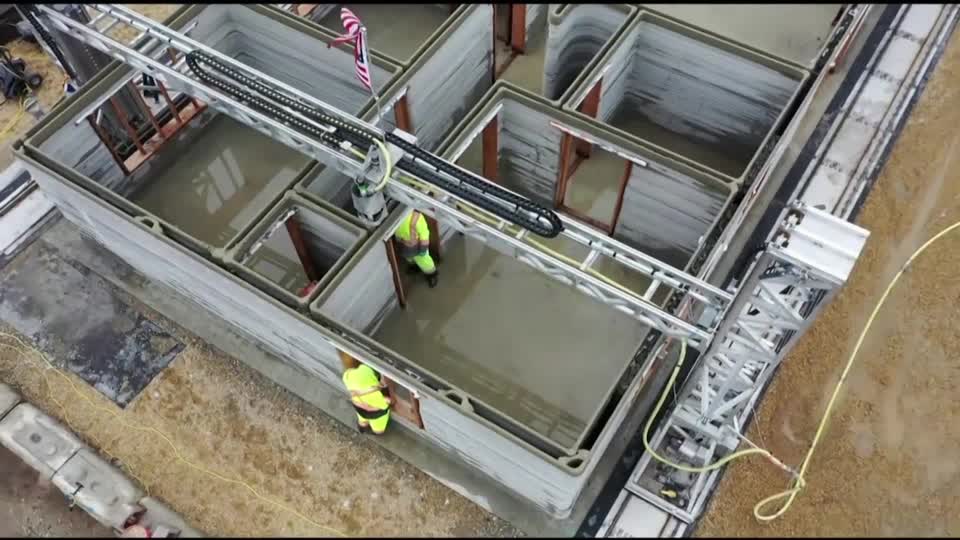
Will revolutionise construction one day but as we're still tech dinosaurs it will be a long time to come yet.

Don't think it's far off :lol:


One example of a use is something I’m currently working on, a remote control focuser for my telescope. It needed a ring that fit over the focus knob with cog teeth on the outside, a mount for a motor and a motor cog to sit between the two bits. Something unique but very cheap to do. I couldn’t have made anything like that without a printer.
 
One example of a use is something I’m currently working on, a remote control focuser for my telescope. It needed a ring that fit over the focus knob with cog teeth on the outside, a mount for a motor and a motor cog to sit between the two bits. Something unique but very cheap to do. I couldn’t have made anything like that without a printer.

What software did you use to create the part? Or did you get a file from the online community ?
 
I got a 3d printing pen free, Amazon delivered the wrong thing so I've put it away for the bairn for Christmas. He's expressed interest in a 3d printer but he's a bit young for that tbh.
 
I left the groups I was in on facebook. most of the time it was full of questions about what are they doing wrong, other times was loads of pictures of crap prints they thought were great. the plastic printers are a constant faff I just couldnt be arsed with, resin printers were great quality but everyone just prints superhero stuff or models and I have no interest in that so I gave the idea up.
 
What software did you use to create the part? Or did you get a file from the online community ?
I use OpenSCAD, and I think it is brilliant.

It is not for everyone because it is essentially creating 3D models using a C/Perl like programming language, but does allow you to use libraries, loops, functions etc and has absolute precision. For example, focus knob is just a cylinder with a number of equally spaced ridges for grip. With OpenSCAD, I was able to copy it by making a cylinder, then using a loop could add the ridges. I put this in a function so if I wanted I can call it with a different diameter cylinder and different number of ridges.

As I wanted a collar that would fit over it, I downloaded a cog library (actually lego cogs, because I'd been mocking it up with my son's lego and thought the type of teeth and spacing looked ideal). In SCAD, you can take one object away from the other, so I could use a cog of suitable size and then take the model of the focus knob away leaving the collar I wanted.

I had to design a motor housing to fit to the scope too, but could do it all programmatically. Because it was hard to visualise where it would fit, I knocked up a whole 3d model of the scope (it is essentially a cylinder so didn't take long) then could move parts around. Because you can do it all with variables, I could change one or two variables and see it move accordingly. There are graphical modelling tools, like TinkerCAD (free and online), but every small change I'd be dragging and dropping. Over the years I have been using it, I have built up a library of my own functions so I can quickly create common shapes that I have used a few times before. One was some storage boxes for a game, that needed to be different sizes but all the same style and I thought why not embed some text on the side. That means I can just call a function: storageBox(width, depth, height, text) and it will make one. If I want that to be a project box for some electronics kit, I can then just cut the holes out for cables (cut from the model, not print it and drill it).

If you have done a bit of programming and understand the basics of loops, functions and variables then I would really recommend this.

The end result was (if I can paste images correctly):
Logon or register to see this image


It also shows some of the downsides and thought that needs to go in. The motor housing was printed upside down. I forgot that it has a cutout for the lugs on the motor and as a result it started printing the shafts for the screws in thin air, that is why it looks a bit crappy just below the nut and the covering plate. You can print support to stop that, and it impressively managed to recover, but shows after the design phase you really need to think about the physical phase of how it will print and how your printer behaves. At some point I might reprint that, but I wanted to see if it works first.

This was it knocked up in OpenSCAD, including a rough model of the scope and the motor to help me:
https://ibb.co/ftv1032

Where the two cogs meet, I was able to zoom in and tweak a couple of settings until they met just right, and then print it.
I’m going to get myself one of these and print myself a 3D Printer!
I'm not sure if you are serious, but a friend did that.

He wanted a high volume one to print big stuff (he was interested in making his own drones), where as your usual ones usually have a build plate of about 22cm. There are some metal rails you can get which work really well for making your own printer frame, so he used one printer to print the joining corners, the housing for the electronic the extruder head etc. End result was a cheap but pretty good high volume printer. All the electronics, heating and metal frame parts he had to buy, but it worked out a fraction of the cost, then he sold the printer he printed it with.
 
Last edited:
I use OpenSCAD, and I think it is brilliant.

It is not for everyone because it is essentially creating 3D models using a C/Perl like programming language, but does allow you to use libraries, loops, functions etc and has absolute precision. For example, focus knob is just a cylinder with a number of equally spaced ridges for grip. With OpenSCAD, I was able to copy it by making a cylinder, then using a loop could add the ridges. I put this in a function so if I wanted I can call it with a different diameter cylinder and different number of ridges.

As I wanted a collar that would fit over it, I downloaded a cog library (actually lego cogs, because I'd been mocking it up with my son's lego and thought the type of teeth and spacing looked ideal). In SCAD, you can take one object away from the other, so I could use a cog of suitable size and then take the model of the focus knob away leaving the collar I wanted.

I had to design a motor housing to fit to the scope too, but could do it all programmatically. Because it was hard to visualise where it would fit, I knocked up a whole 3d model of the scope (it is essentially a cylinder so didn't take long) then could move parts around. Because you can do it all with variables, I could change one or two variables and see it move accordingly. There are graphical modelling tools, like TinkerCAD (free and online), but every small change I'd be dragging and dropping. Over the years I have been using it, I have built up a library of my own functions so I can quickly create common shapes that I have used a few times before. One was some storage boxes for a game, that needed to be different sizes but all the same style and I thought why not embed some text on the side. That means I can just call a function: storageBox(width, depth, height, text) and it will make one. If I want that to be a project box for some electronics kit, I can then just cut the holes out for cables (cut from the model, not print it and drill it).

If you have done a bit of programming and understand the basics of loops, functions and variables then I would really recommend this.

The end result was (if I can paste images correctly):
Logon or register to see this image


It also shows some of the downsides and thought that needs to go in. The motor housing was printed upside down. I forgot that it has a cutout for the lugs on the motor and as a result it started printing the shafts for the screws in thin air, that is why it looks a bit crappy just below the nut and the covering plate. You can print support to stop that, and it impressively managed to recover, but shows after the design phase you really need to think about the physical phase of how it will print and how your printer behaves. At some point I might reprint that, but I wanted to see if it works first.

This was it knocked up in OpenSCAD, including a rough model of the scope and the motor to help me:
https://ibb.co/ftv1032

Where the two cogs meet, I was able to zoom in and tweak a couple of settings until they met just right, and then print it.

I'm not sure if you are serious, but a friend did that.

He wanted a high volume one to print big stuff (he was interested in making his own drones), where as your usual ones usually have a build plate of about 22cm. There are some metal rails you can get which work really well for making your own printer frame, so he used one printer to print the joining corners, the housing for the electronic the extruder head etc. End result was a cheap but pretty good high volume printer. All the electronics, heating and metal frame parts he had to buy, but it worked out a fraction of the cost, then he sold the printer he printed it with.
:lol:
 

Back
Top